You're running a course with multiple cohorts launching each month. Each cohort needs its own dedicated space for discussions, assignments, and progress tracking, but you want everyone to feel part of your broader learning community.
Or you're building tiered memberships - free members, premium subscribers, and VIP supporters. Each tier needs different access and content, but you want to maintain one unified brand experience.
Maybe you're converting social media followers into community members. Some join for beginner content, others for advanced discussions. Each person needs an onboarding experience that matches why they joined.
The challenge? A single community feed doesn't scale. New members get overwhelmed. Premium members can't find their exclusive content. Cohort discussions mix together. You're stuck manually sorting people into the right places - if you even have a way to separate them at all.
One Community, Multiple Focused Experiences
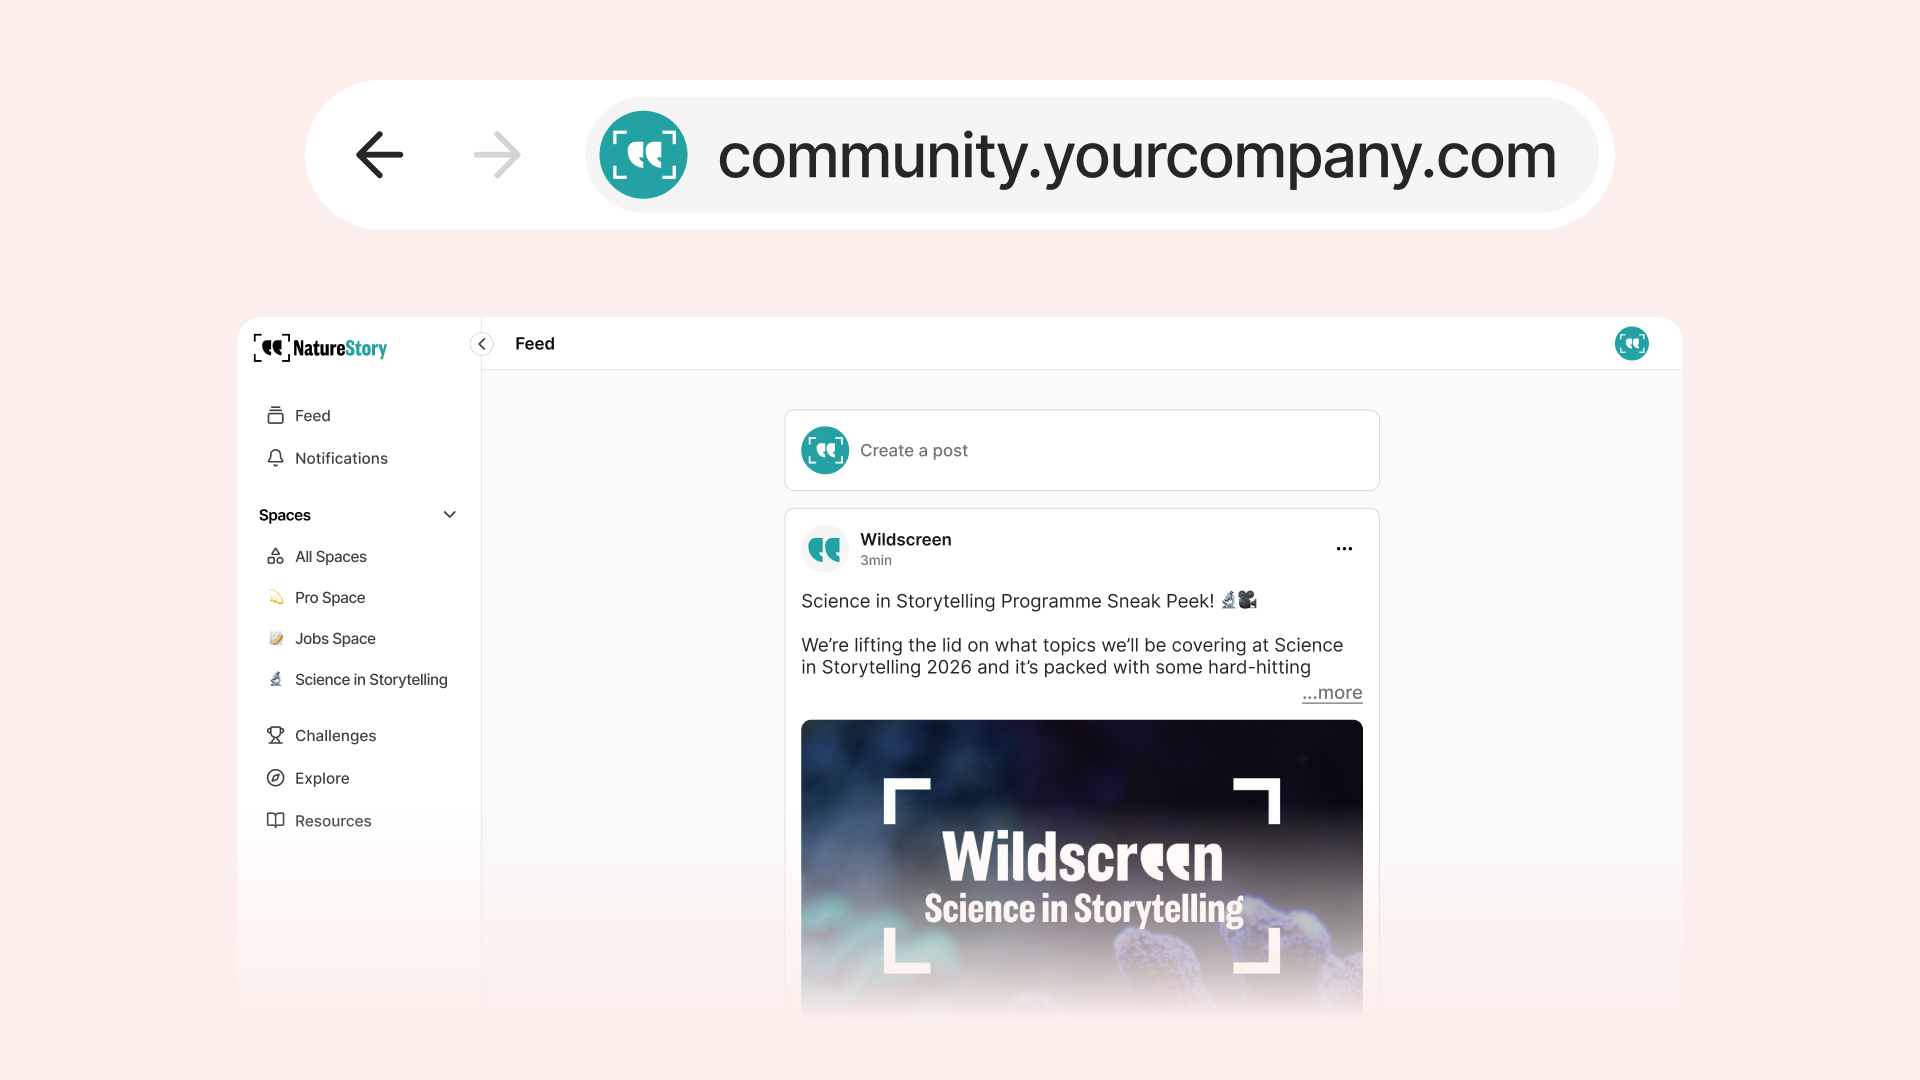
Spaces solve this by letting you create focused sub-communities within your main platform. Each space has its own feed, members, and content - while everyone remains part of your unified community.
Your course students land in their specific cohort space. Your premium members access exclusive discussions. Your beginner workshop participants start in the beginner space. Everyone sees what's relevant to them without the noise.
This isn't about fragmenting your community across different platforms. Everyone stays in one place, under your brand. Spaces simply organize the experience so each member sees what matters to them.
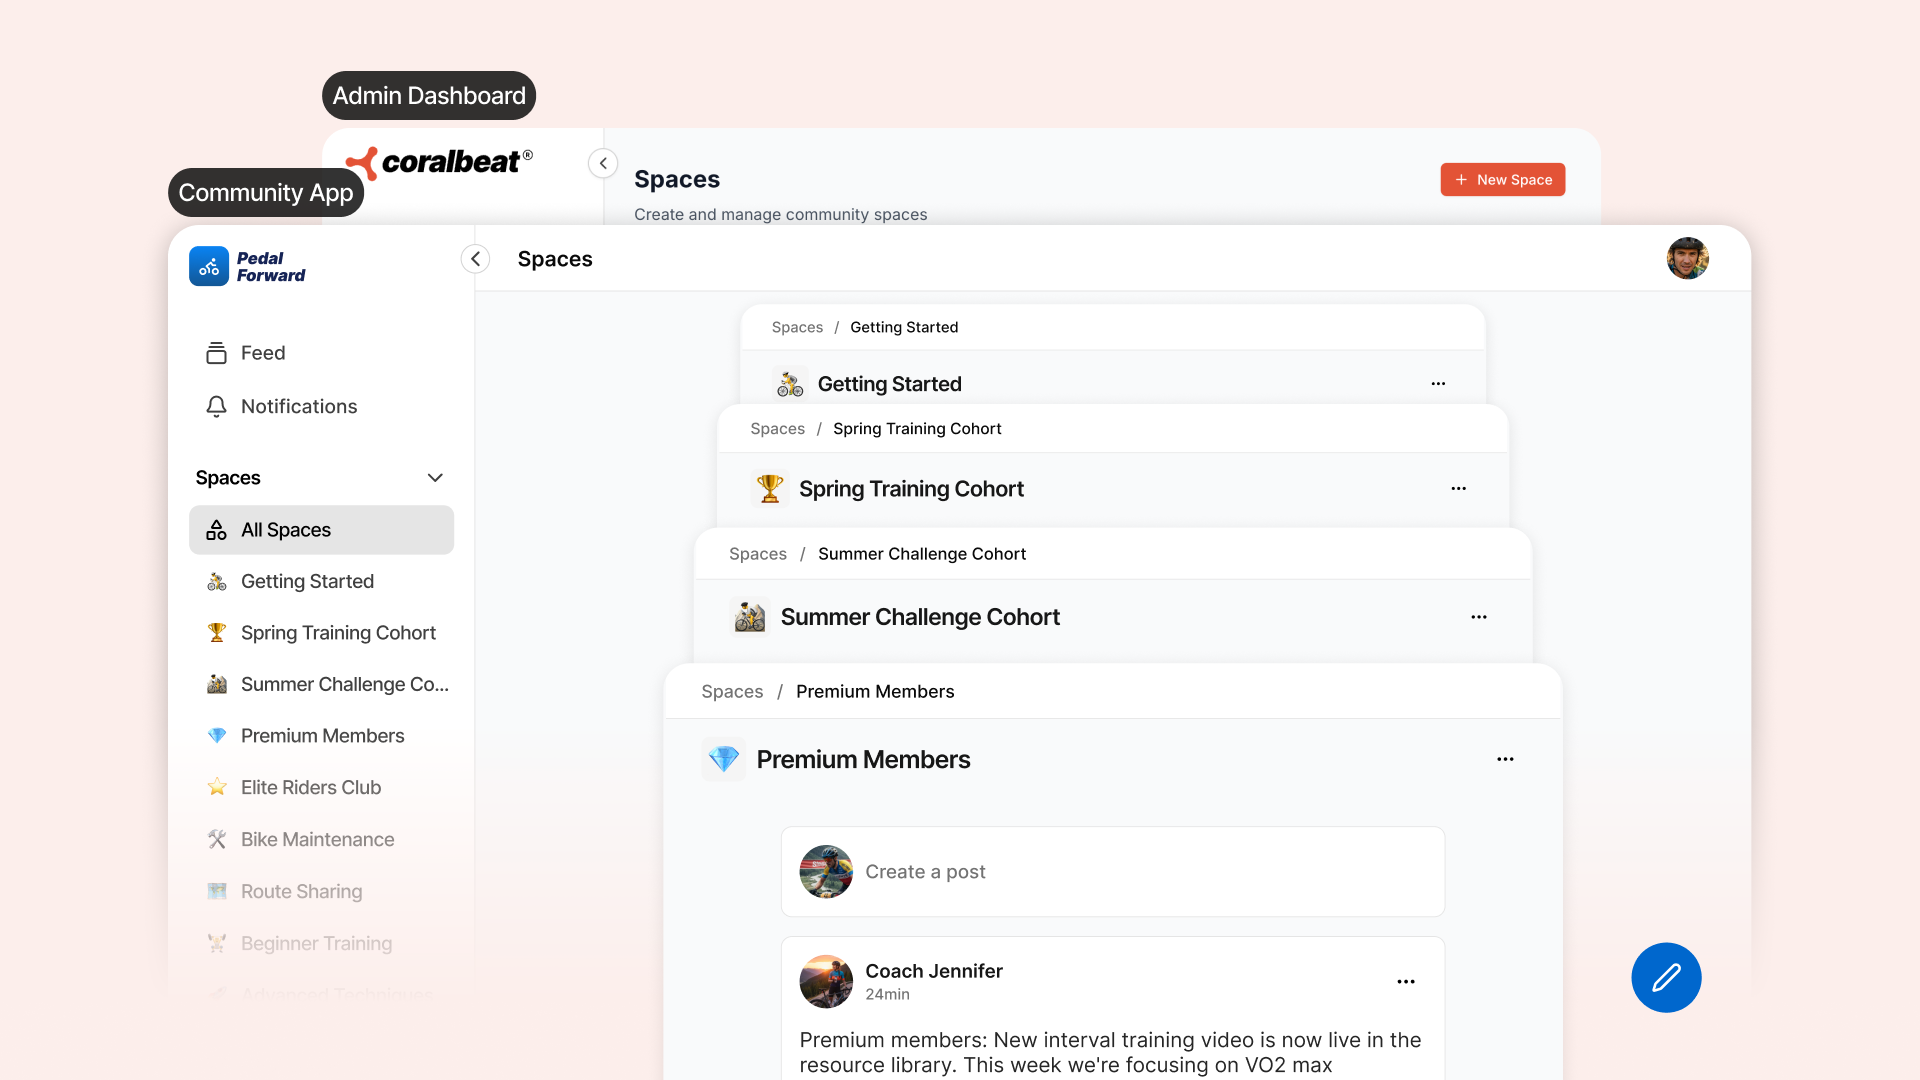
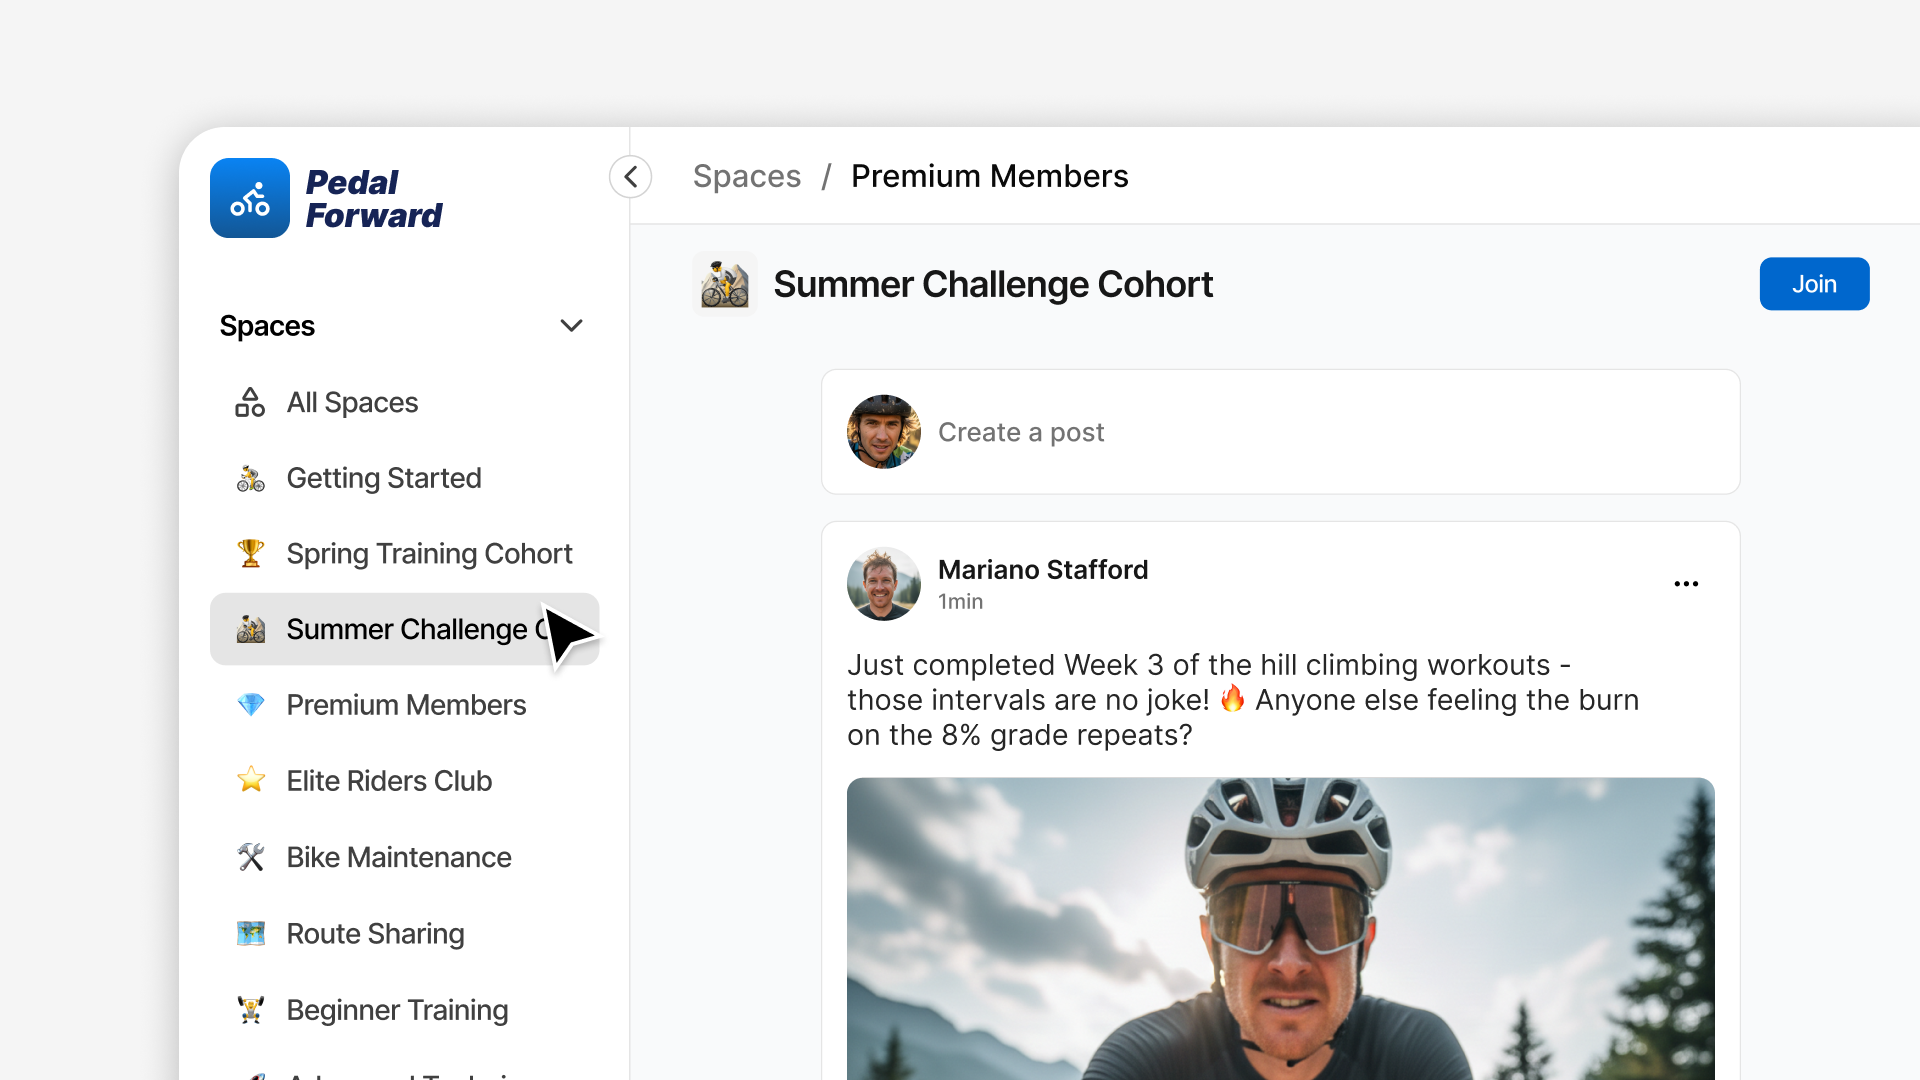
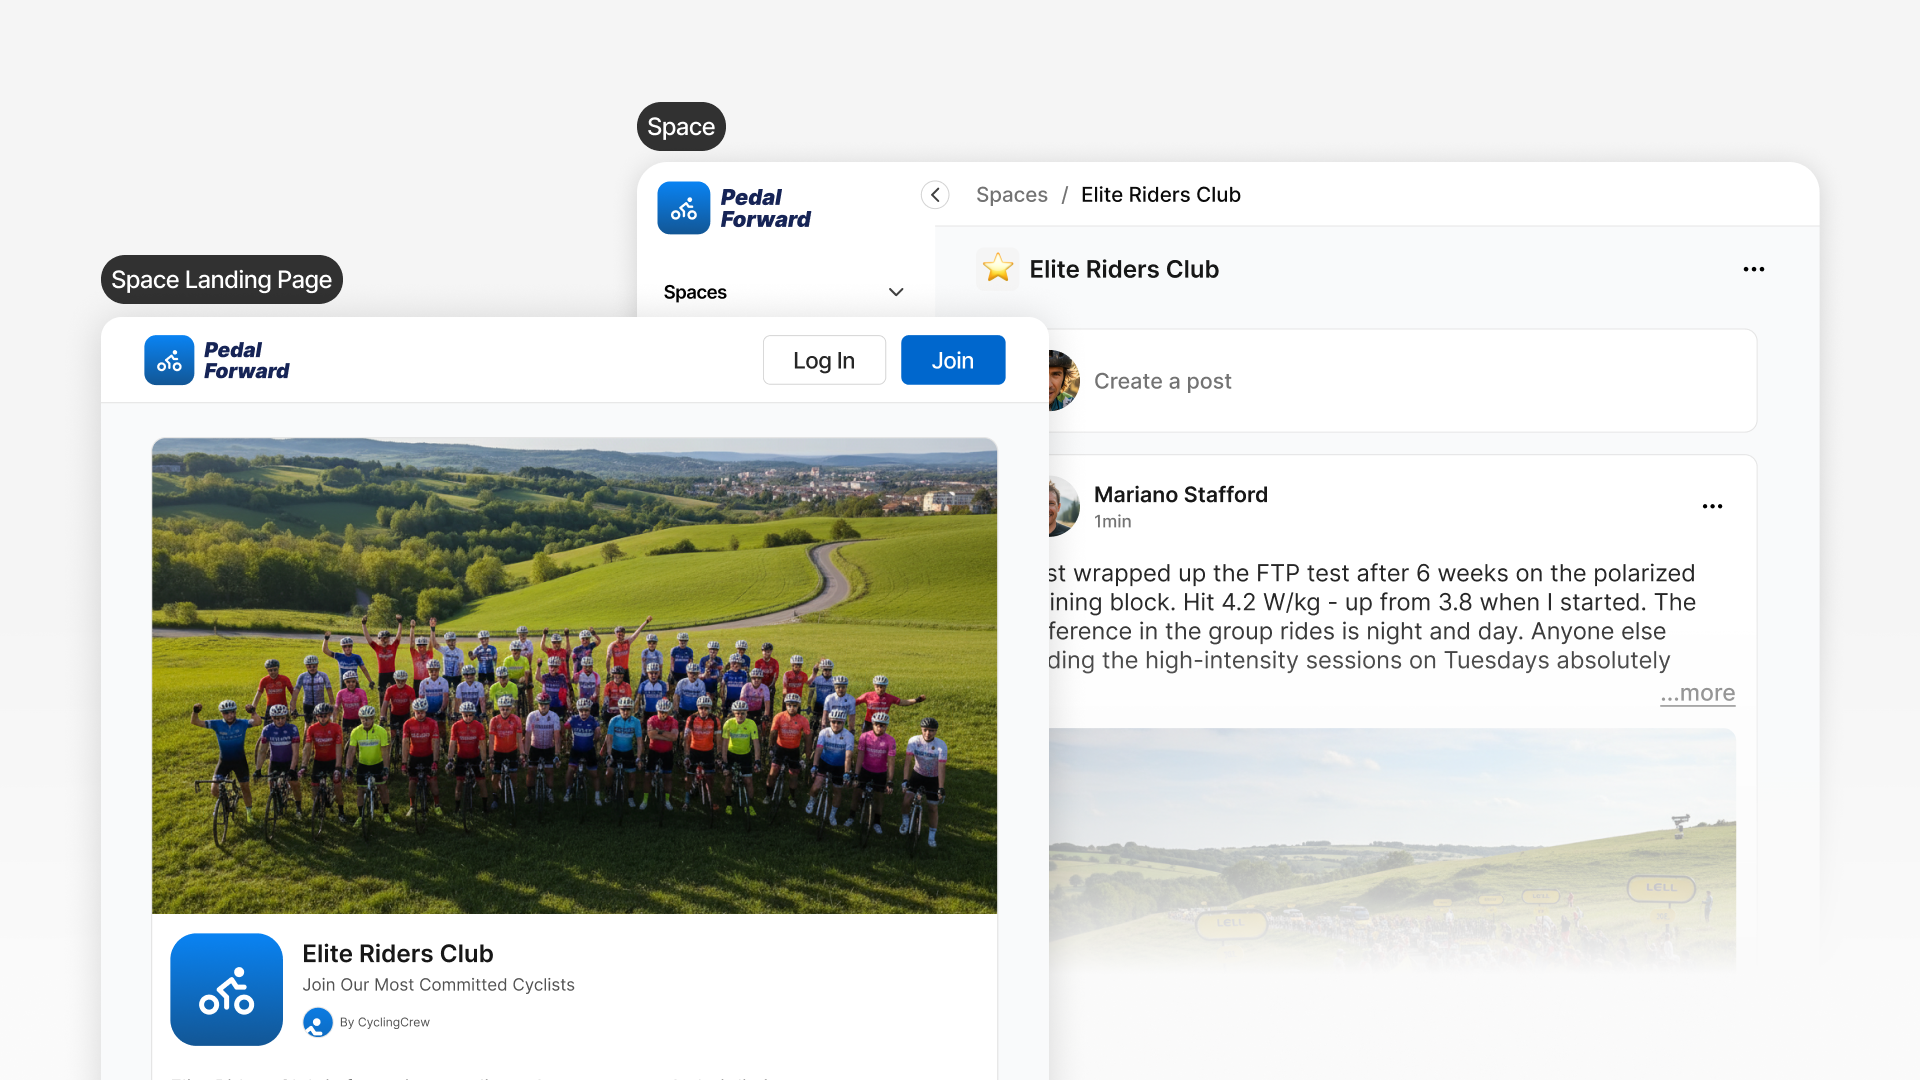
Think of running a cycling community. You might have spaces for Getting Started, Spring Training Cohort, Premium Members, Elite Riders Club, and Bike Maintenance. Members can join multiple spaces based on their interests, but their feed shows only content from spaces they're part of. As they grow, they discover new spaces. As you launch new cohorts or programs, you create new spaces.
Control Who Sees and Joins Each Space
Every space you create can have different visibility and access rules:
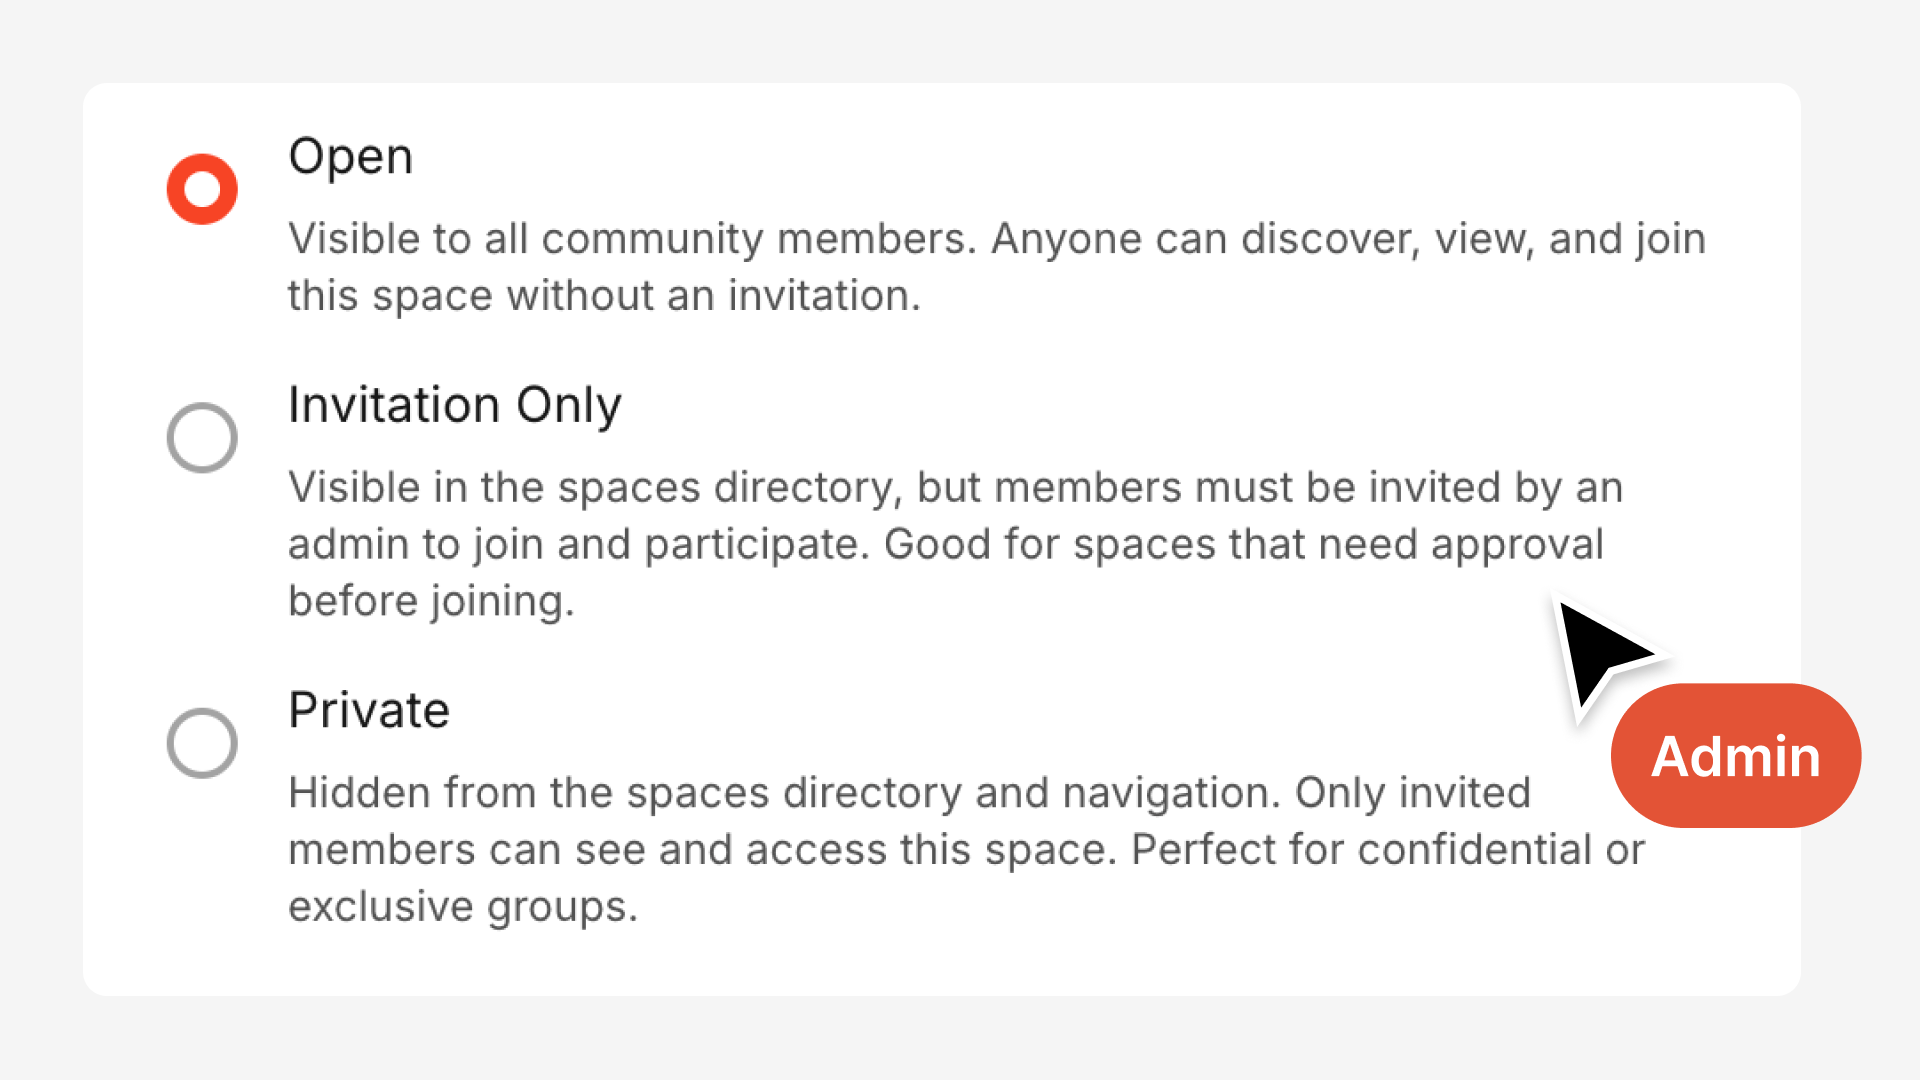
Open Spaces
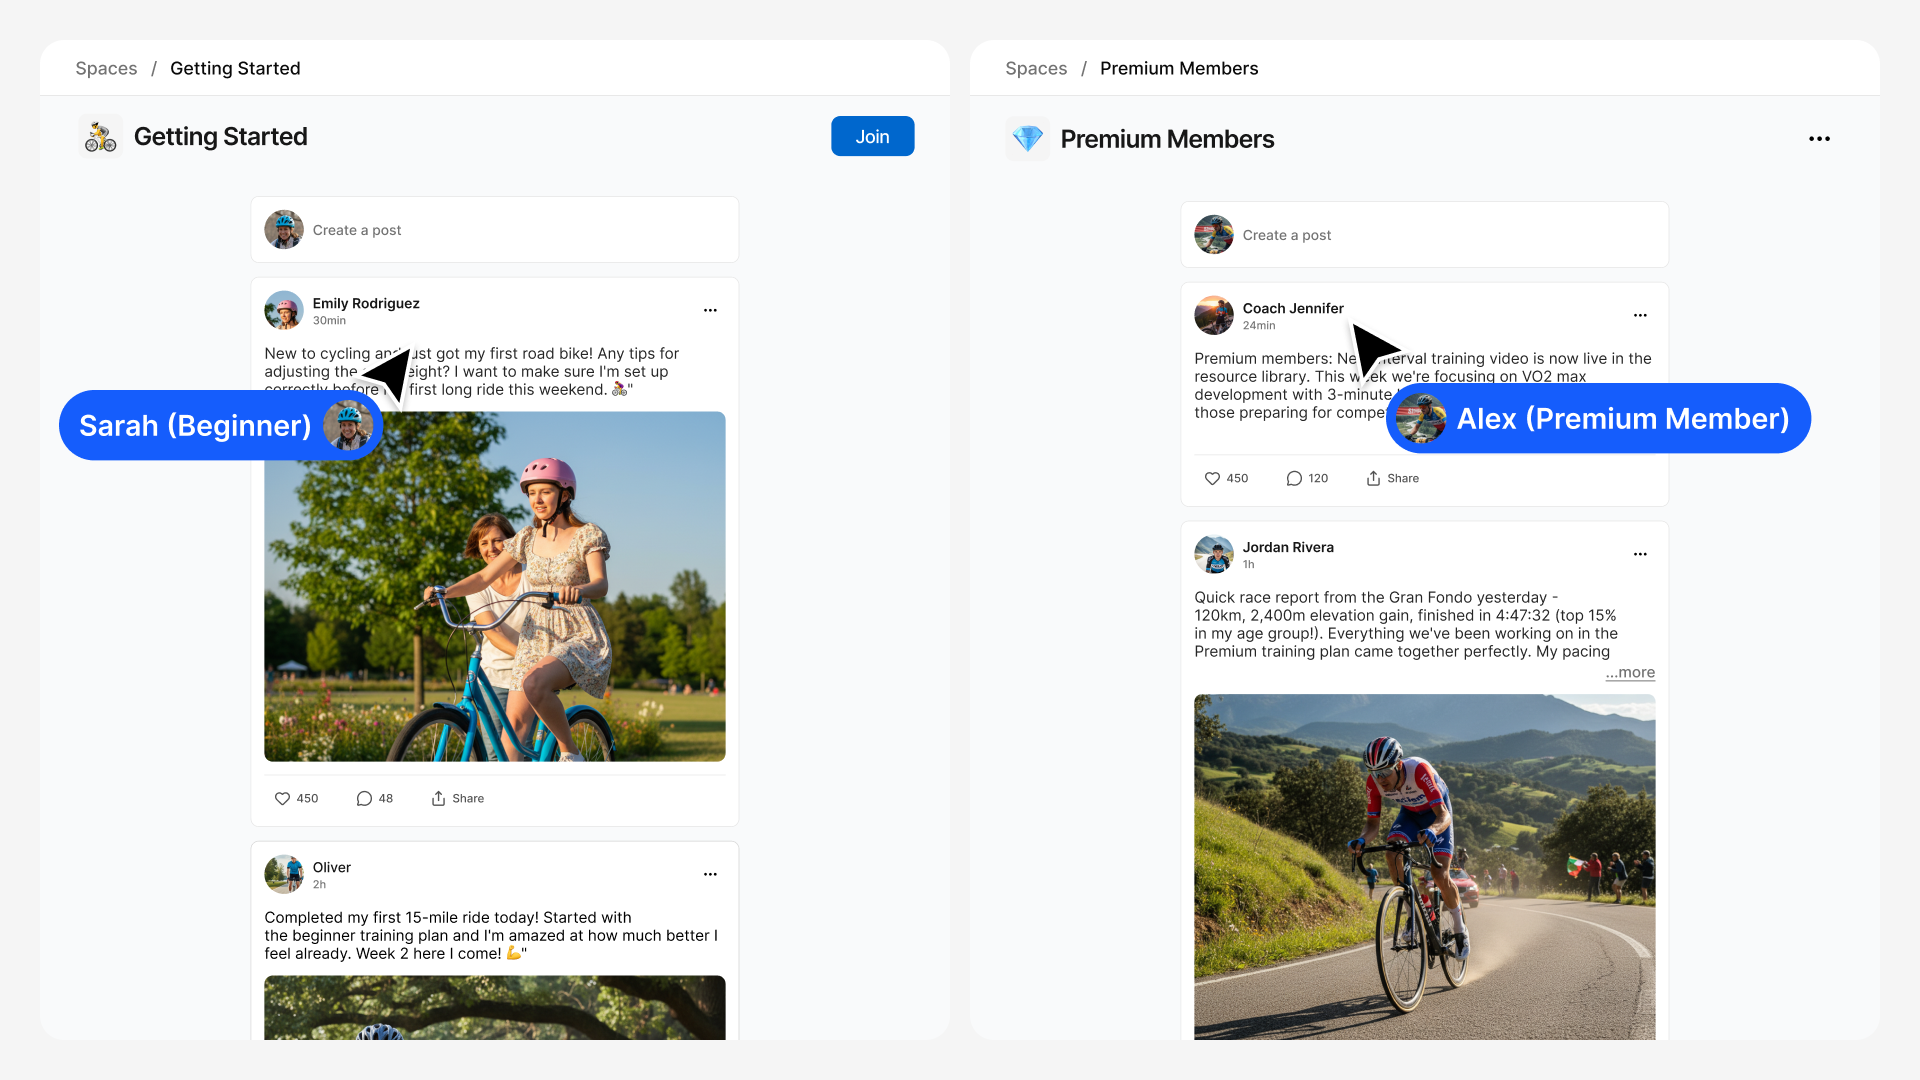
Any member in your community can discover and join these spaces freely. Perfect for general interest topics, getting started areas, or discussions where broad participation creates value.
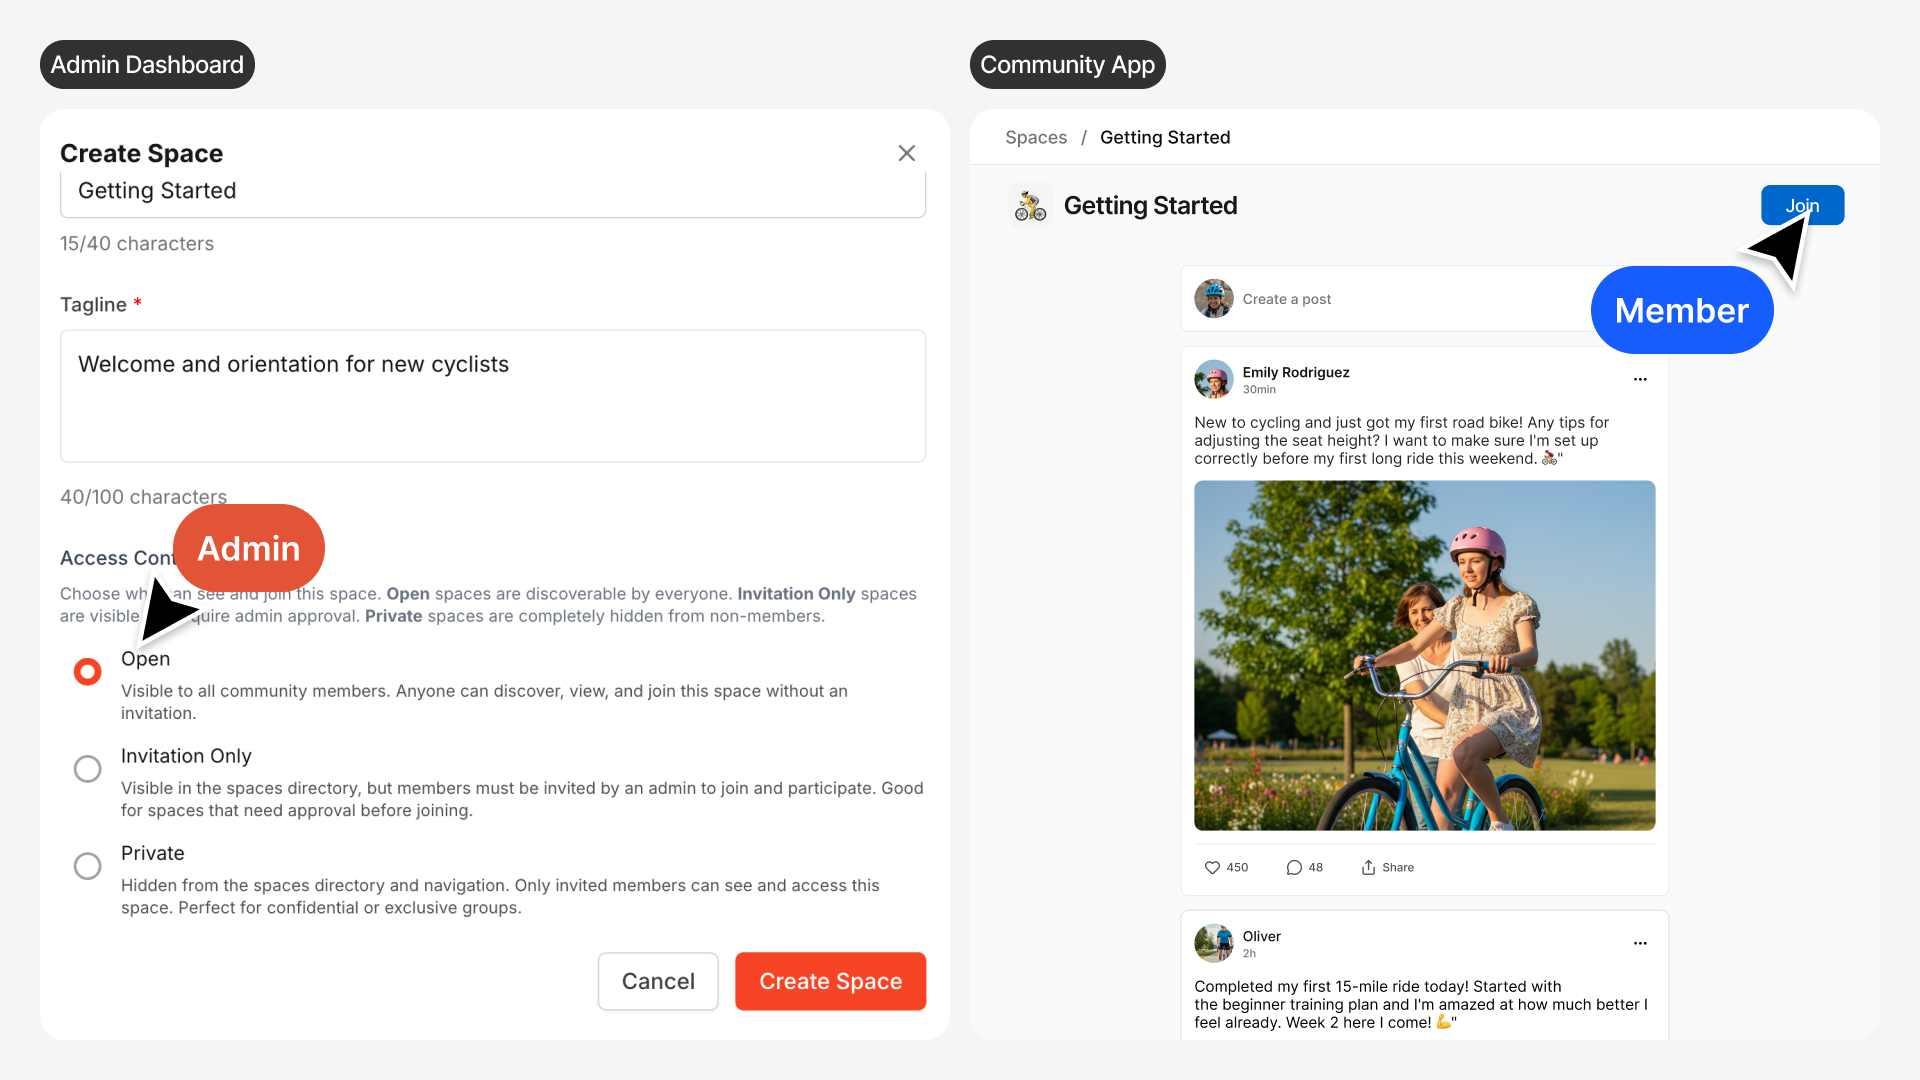
Use open spaces when you want members to self-select based on interest. Your "Getting Started" space helps new members orient themselves. Your "General Discussion" space keeps the community connected. Your "Photography Tips" space attracts everyone interested in the topic.
Invitation-Only Spaces
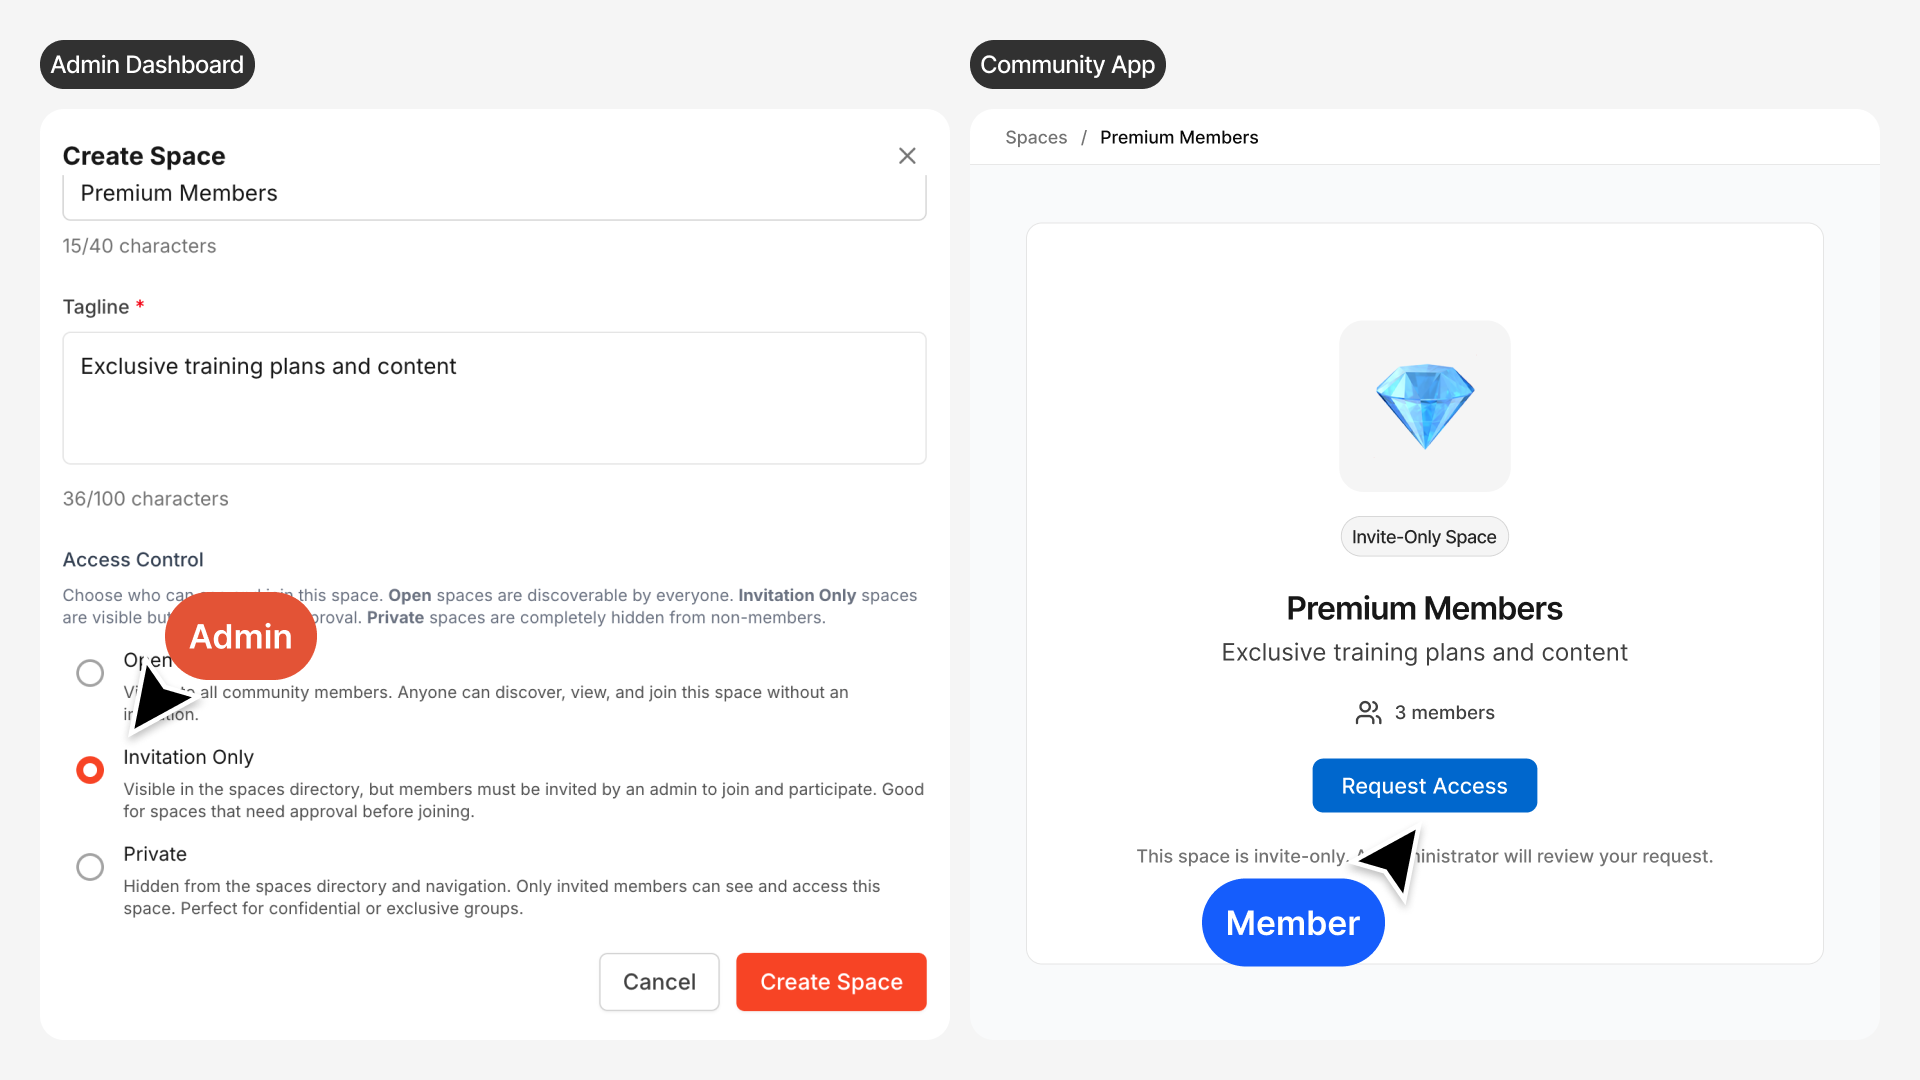
These spaces are visible to all members, but joining requires your approval. Members can see the space exists, browse its description, and request access - but you control who gets in.
This works beautifully for cohort-based programs. Students can see that different cohorts exist, but they only join their specific cohort. Or use it for specialized groups where you want to vet participants before granting access - beta testing groups, accountability pods, or advanced workshops that require prerequisites.
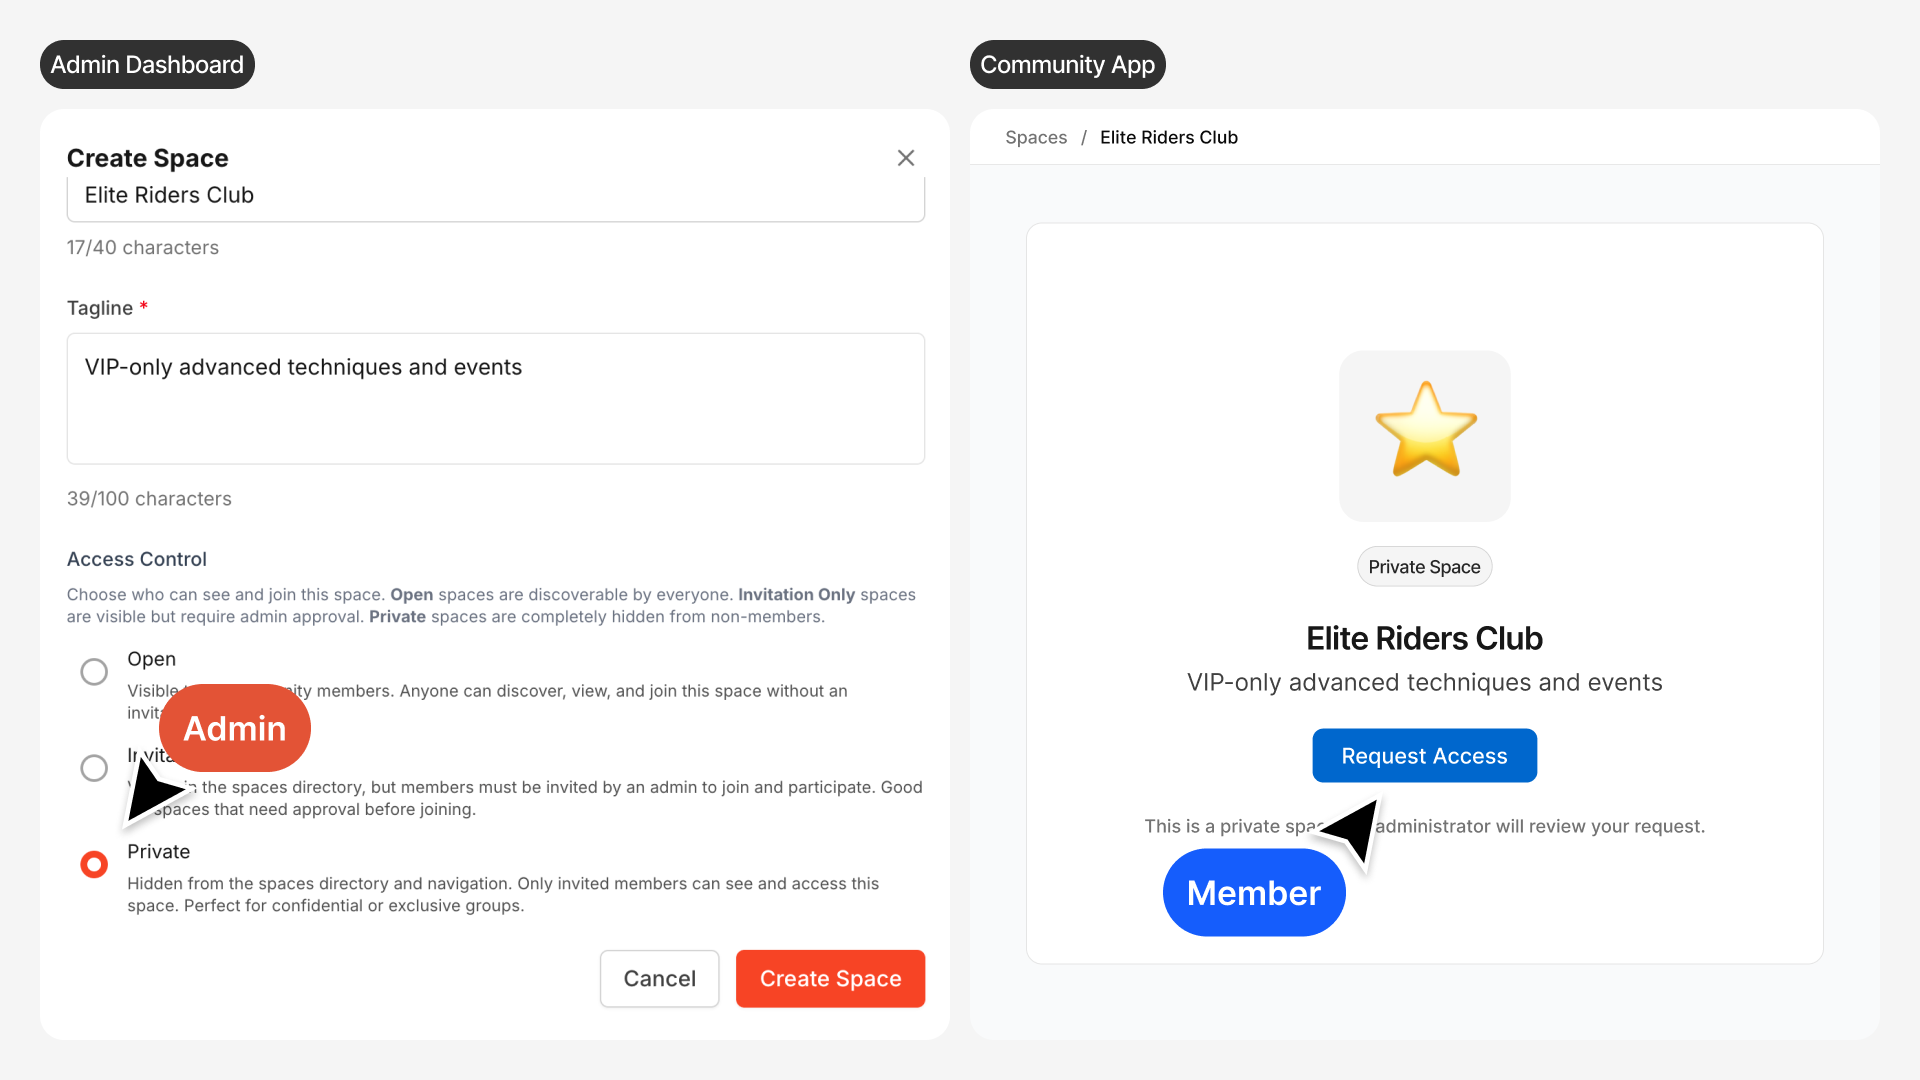
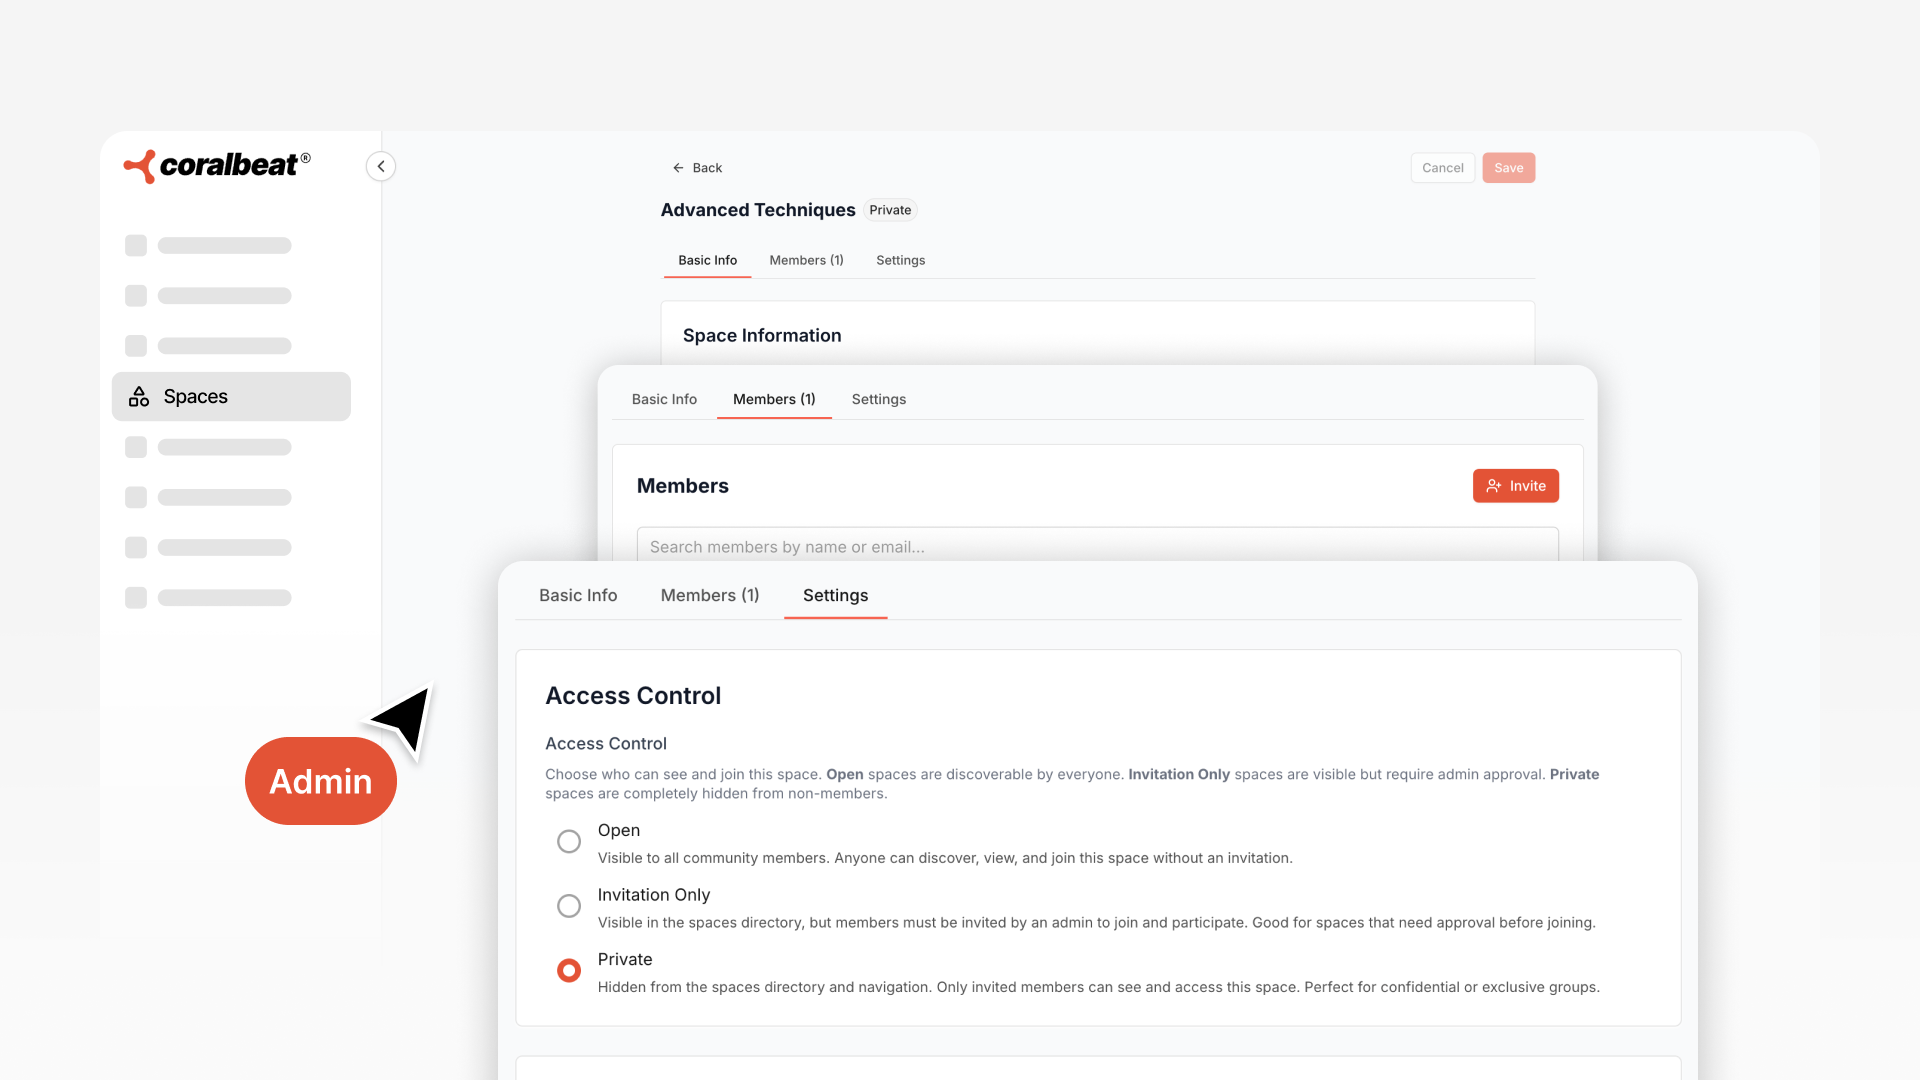
Private Spaces
Completely hidden unless you explicitly invite someone. Only invited members can see the space exists or access its content.
Use private spaces for exclusive membership tiers, VIP supporter groups, executive circles, or any situation where confidentiality matters. Your free members never see that a VIP space exists - they only discover it when they upgrade. This creates natural progression and maintains exclusivity without making other members feel excluded from something they can see but can't access.
You can change access settings anytime. Start a new cohort space as private while you're setting it up, then switch to invitation-only when you're ready to enroll students. Or take a space that was open and make it private as it evolves into an exclusive mastermind group.
Automatically Route Members to the Right Space
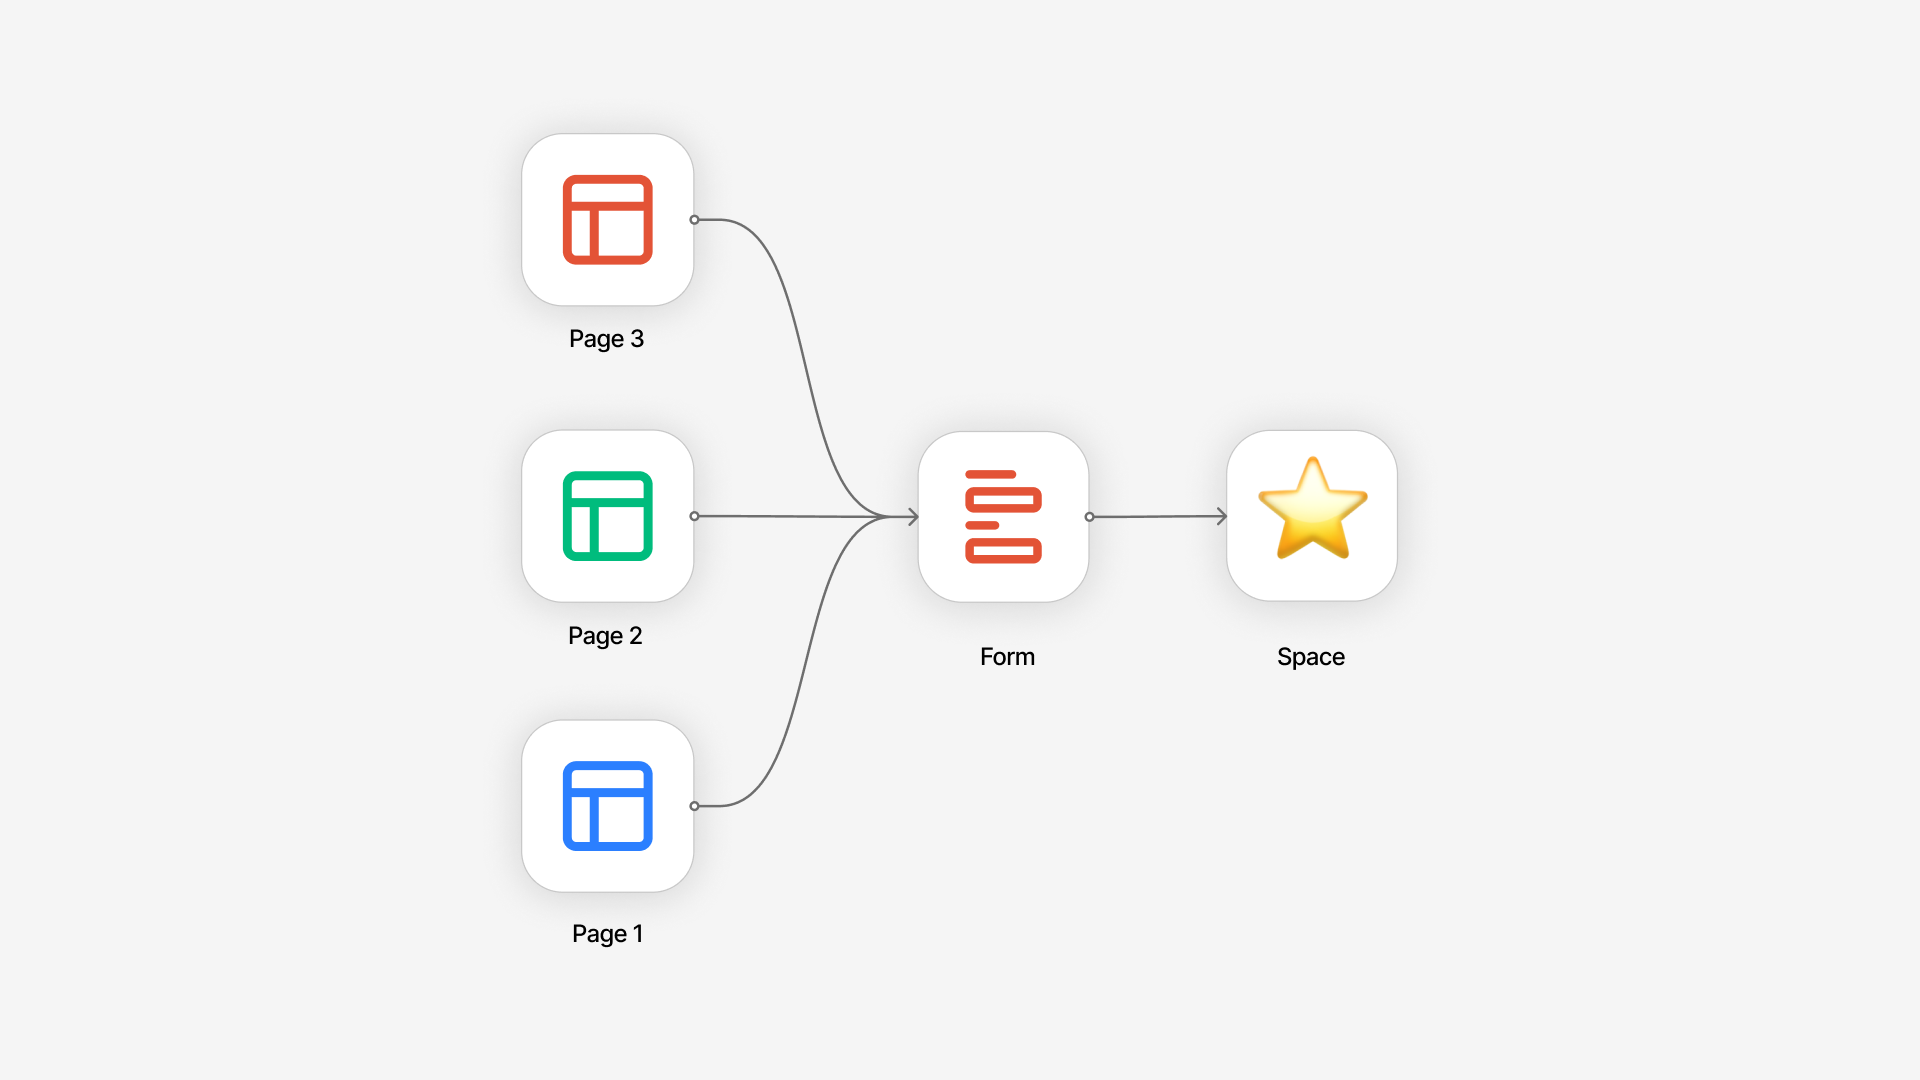
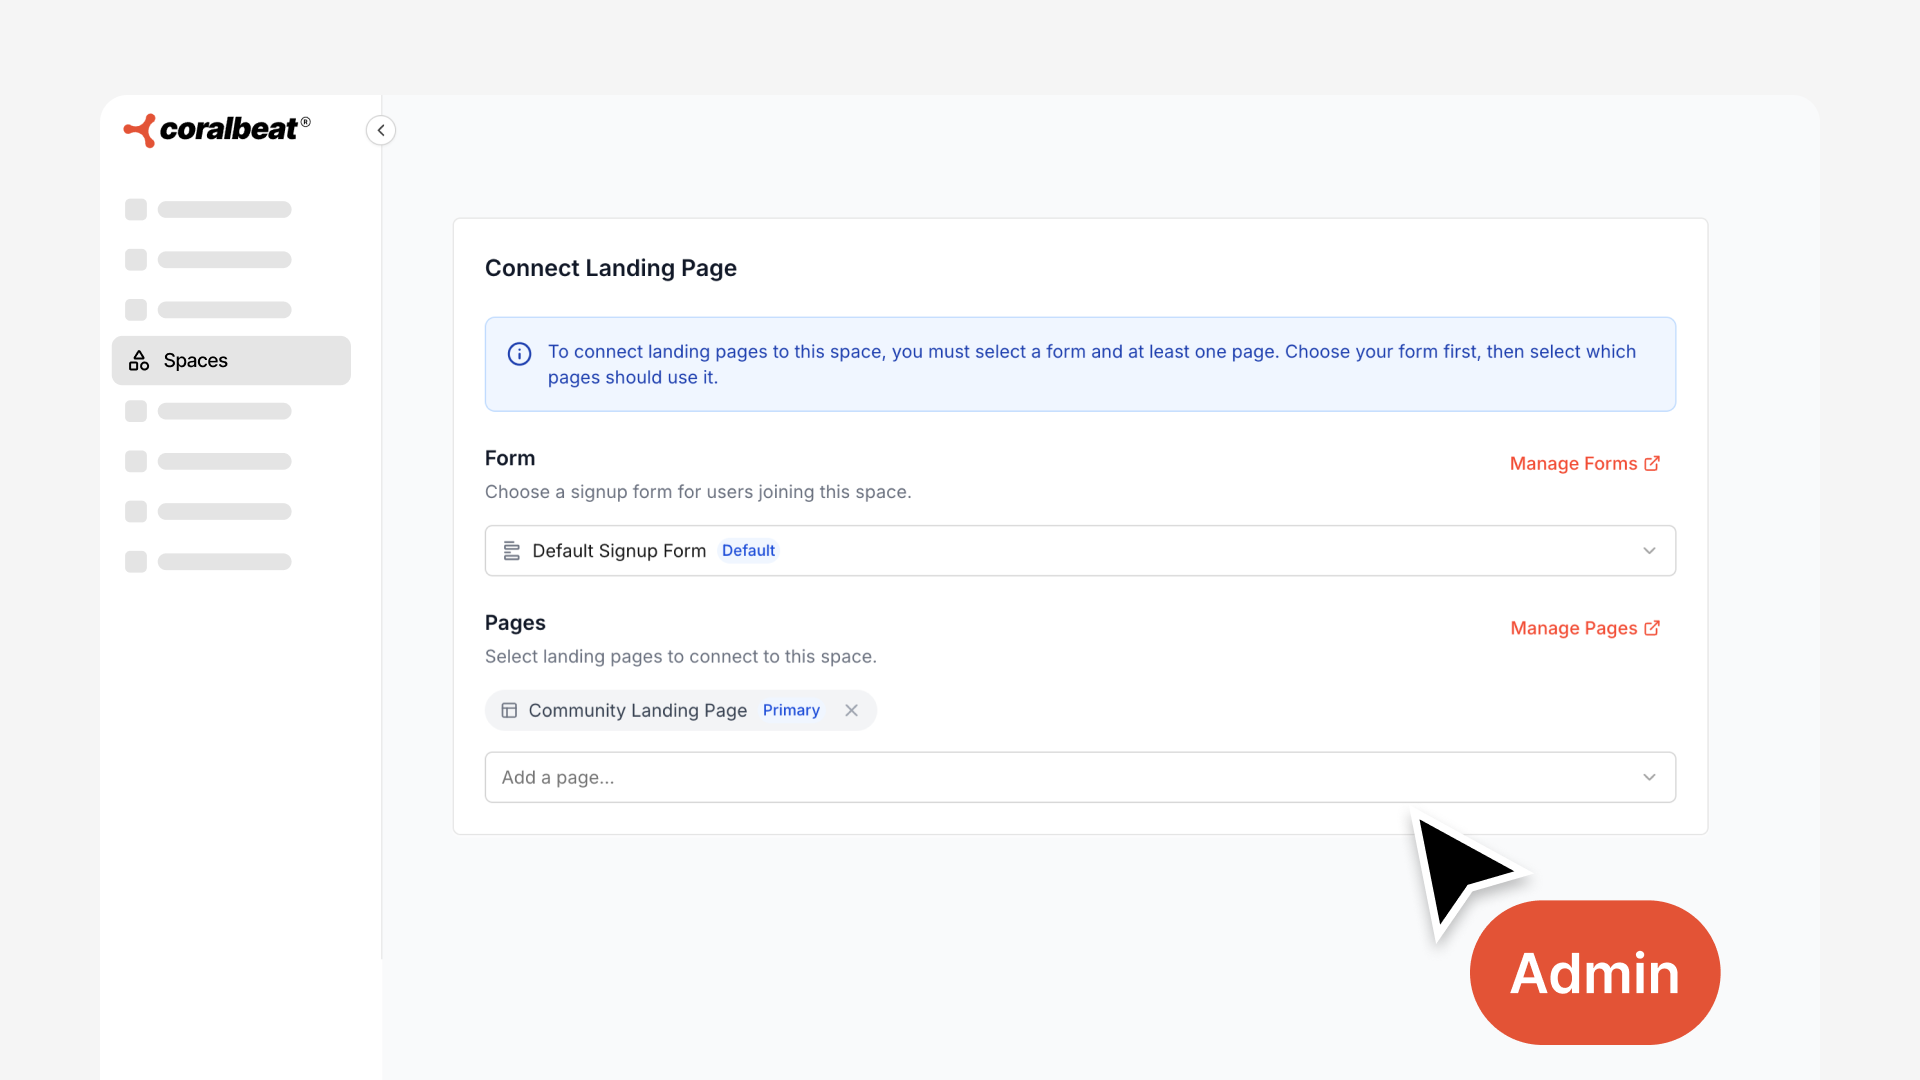
Here's where Spaces become powerful for growth: you can connect signup forms and landing pages directly to specific spaces. This creates unique onboarding experiences without any manual work.
When someone signs up through a specific landing page, they automatically join the connected space. No manual sorting. No generic "welcome to the community" experience where they have to figure out where to go. They land exactly where they need to be from day one.
How This Works in Practice
Running a course launch? Create a dedicated signup form and landing page for that cohort, connected to the cohort's space. Everyone who registers through that campaign automatically joins the cohort space with their fellow students. They see cohort-specific discussions, materials, and updates immediately.
Launching a premium membership tier? Connect your premium signup flow to the premium space. Paying members automatically get access to exclusive content the moment they join. No delay, no manual activation.
Converting social media followers? Create different landing pages for different entry points - one for your beginner workshop, one for your advanced program, one for general community membership. Each landing page routes new members to the appropriate space. The person who joined for your beginner workshop sees beginner content. The person interested in advanced techniques lands in the advanced space.
You can also connect multiple landing pages to the same space - useful when running varied marketing campaigns that all lead to the same program.
This transforms how you grow your community. Instead of everyone landing in the same place and getting lost, each person gets an experience tailored to why they joined. Your course students immediately see their cohort. Your premium members immediately access their exclusive content. Your workshop participants immediately connect with others in the same program.
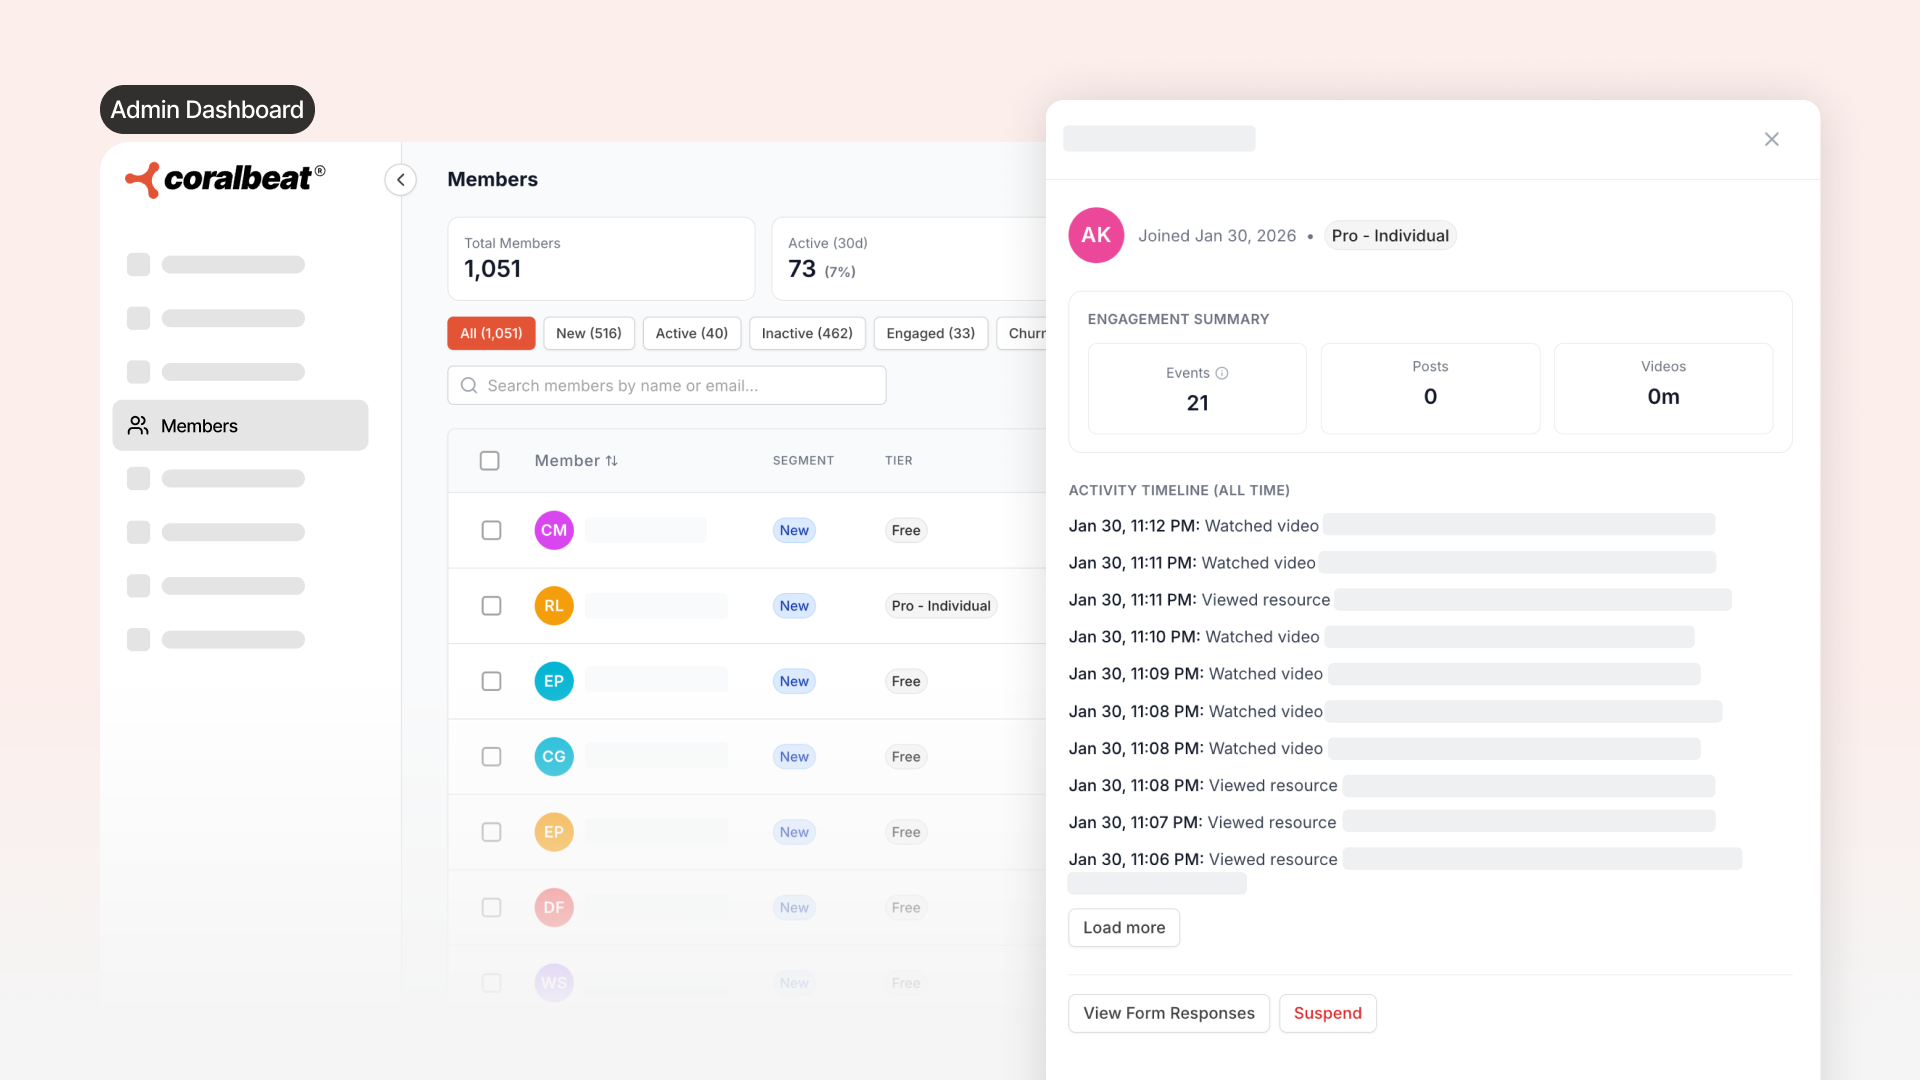
Manage Everything from One Dashboard
From Community → Spaces in your admin panel, you have complete control over all your spaces:
Update space details whenever needed. Change the name, icon, tagline, or access control settings as your community evolves. A cohort space might start as "Q1 Cohort" and become "Alumni Network" after graduation. A beta testing space might start private and open up once the program launches.
Add or remove members directly. When someone upgrades to premium, add them to the premium space. When a student completes your program, move them from the active cohort space to the alumni space. When someone's access expires, remove them - all without complex workflows or manual tracking.
View space members at a glance. See everyone in each space to keep track of who has access and manage membership as needed.
How Communities Use Spaces
Cohort-Based Courses and Programs
Create a dedicated space for each cohort. Students automatically join their cohort space through signup forms, seeing only their group's discussions and progress. This creates strong peer connections - students go through the program together, not in isolation.
After completion, convert cohort spaces into alumni networks or remove them while moving members to ongoing community spaces.
Tiered Membership Structures
Build different experiences under one brand. Open spaces for free members. Private spaces for premium members. Hidden VIP spaces for top supporters.
Free members see that premium spaces exist (building curiosity to upgrade) but can't access them. VIP spaces remain invisible until someone reaches that tier. When members upgrade, add them to premium spaces to grant immediate access.
Topic-Based Organization
Create open spaces for major topics or skill levels. Members join what interests them. A business community might have Marketing, Operations, Sales, and Leadership spaces. A fitness community might have Beginner Workouts, Advanced Training, and Nutrition spaces.
As new topics emerge, create spaces to formalize them. Your structure grows naturally with your community.
Working Groups and Projects
Create invitation-only or private spaces for projects, committees, or working groups. Each group collaborates without general community noise while staying connected to the larger community. Repurpose or remove spaces when projects complete.
Getting Started with Spaces
Creating your first space takes just a few minutes:
- Go to Community → Spaces in your admin panel
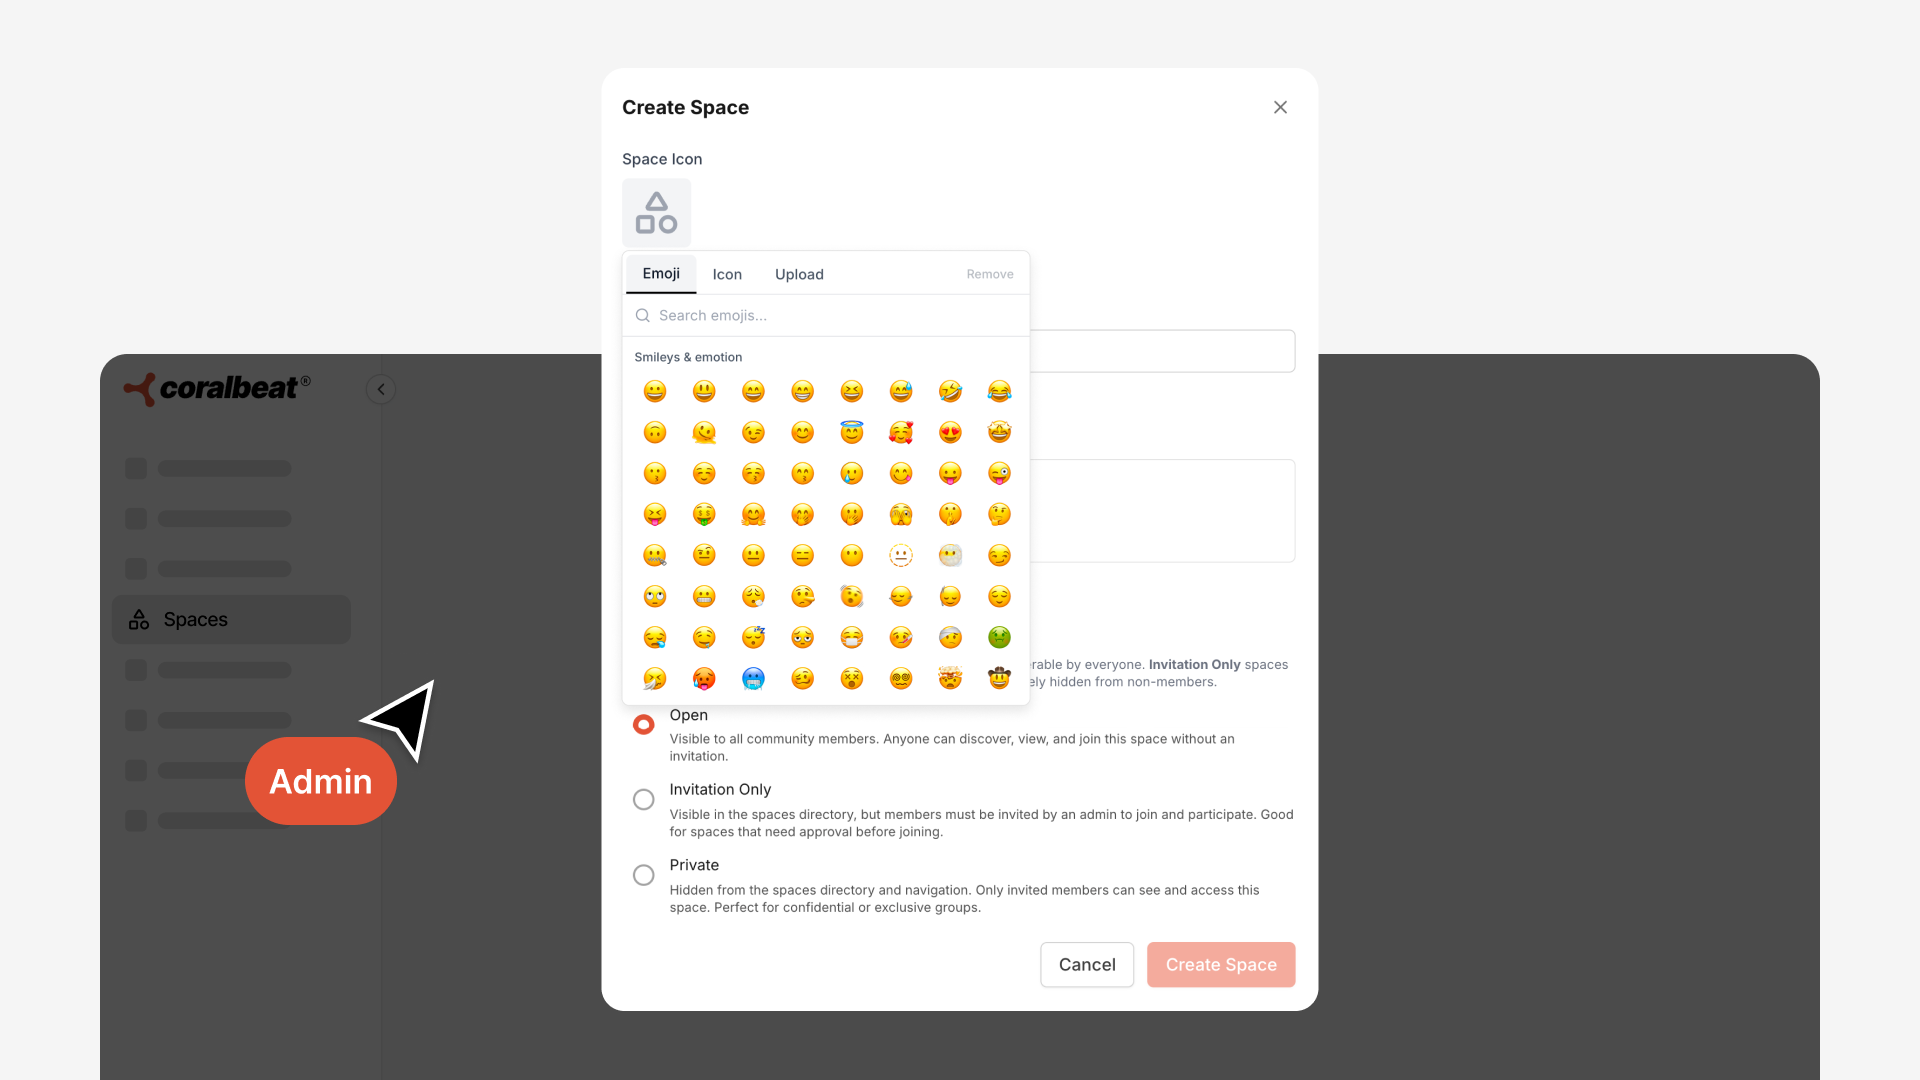
- Set an icon that helps members recognize the space visually
- Choose a name that clearly describes the space's purpose
- Add a tagline explaining what the space is for
- Select access control - open, invitation-only, or private
Start with 2-3 spaces that serve clear needs in your community right now. Don't try to create your entire structure upfront. You might begin with "Getting Started" (open) for new members, "Premium Members" (private) for paying subscribers, and a space for your first cohort or program.
As you identify additional needs - new cohorts launching, topics emerging, membership tiers expanding - create spaces to match. The structure grows organically with your community rather than forcing a rigid hierarchy from day one.
The most successful communities start simple and add structure as patterns become clear. Create spaces that solve real problems you're experiencing now, not hypothetical ones you might face later. Your members' behavior will show you where additional organization adds value.
Within minutes of creating a space, you can connect it to signup forms and start automatically routing new members to the right place based on how they join. No technical knowledge required. No complex setup. Just thoughtful organization that makes your community more valuable for everyone.